Items which are fundamental to the story, along with their purposes and locations.
Click on these icons to view location screenshots.
Gold (G) values are the prices at which shops sell the items. This does not mean that all items can be bought at shops, just that if you were to sell them, that’s how much you’d pay to get them back.
Jewel of Light
—G
Purpose:
You need this Jewel and the Jewel of Evil in order to get the Holy (Force) Sword.
Use on:
Not applicable
Location:
Galam Castle, after beating Battle #5.
You can’t really do anything with this (not even sell it!) because it’s an essential item. It just stays hung around Bowie’s neck, so forget about it for a while.
Jewel of Evil
—G
Purpose:
You need this Jewel and the Jewel of Light in order to get the Holy (Force) Sword.
Use on:
Not applicable
Location:
The Ancient Tower, after beating Battle #7 when King Galam kidnaps Princess Elis.
You can’t really do anything with this (not even sell it!) because it’s an essential item. It just stays hung around Bowie’s neck, so forget about it for a while.
Raft
—G
Purpose:
To travel along rivers in Southern Parmecia
Use on:
Not applicable
Location:
Polca Village. The Mayor will give you a it if you speak with him a few times after the battle inside the village.
Another one that you can’t go through the game without. You can’t not get it, it’s part of the story. Don’t worry about leaving it behind, it’ll still be there when you get back!
Wooden Panel
—G
Purpose:
To open up the Ruins under the tree in Ribble and get the Achilles Sword
Use on:
The tree in Ribble!
Location:
The ruins that Petro’s grandfather (the keeper of the Sky Orb) takes you to (where there used to be a magic tunnel to Grans Island). It’s in the top chest.
When you use this item, you must stand in front of the tree (not under the branches though) and use the A button to select item:use. The C button will not work for this!
Achilles Sword
1,350G
Purpose:
Can be Equipped on Bowie (ATT+19) and to make Rohde tag along
Use on:
Taros, Rohde
Location:
Ribble, in the chest in the ruins beneath the tree. See “Wooden Panel” for how to access this area.
This is the only weapon that can damage Taros, and is also the item you need to interest Rohde. Without it you cannot get the Caravan.
The cave with the sick dwarf, it’s in the firewood.
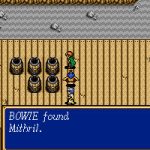
Make sure you get this one, or you won’t be able to get any mithril weapons made for you!
Cotton Balloon
—G
Purpose:
To leave Desktop Kingdom
Use on:
Not applicable
Location:
Desktop Kingdom, King Ponpei will give you it when you beat the Chess Battle
What can I say? Another essential item, which you can’t miss anyway.
Cannon
—G
Purpose:
To clear the rocks at North Cliff, also Rohde can use it to become a Brass Gunner
Use with:
Dynamite and Rohde
Location:
The dwarves in the cave will give you this when the fairy from Creed cures the sick dwarf.
What can I say? Another essential item, which you can’t miss anyway.
Dynamite
—G
Purpose:
To clear the rocks at North Cliff
Use with:
Cannon
Location:
Go to New Granseal and talk to Astral (after you’ve got the Cannon). Then talk to the guy next to the weapon shop. He’ll give you it.
Do make sure that you’ve spoken to Astral first, or the guy won’t give you the dynamite.
Arm of Golem
—G
Purpose:
To restore Claude’s power and make him join
Use on:
Claude
Location:
Moun, nearby the West Gate, an odd looking object will sometimes appear. It’s a sort of brown colour. Search it, and you’ll receive the Arm of Golem.
Take this to Claude’s Shrine (see map) and use it on the thing that looks like a statue… Claude will then join.
Sky Orb
—G
Purpose:
To power the Nazca Ship
Use on:
The Nazca Ship’s Controls
Location:
Nazca, after you’ve killed Cameela.
There’s not much to say about this one – it Cameela gives it to you when you defeat her, and you then use it to power the Nazca Ship. When you’ve got the Sky Orb you can return to Creed’s Mansion and recruit the 3 characters you left behind before.
Holy (Force) Sword
—G
Purpose:
To open the mouth of the Devil’s Head Statue
Use on:
The Devil’s Head Statue
Location:
Near the end of the game, when you return to Grans Island. South of the Tower, where Granseal was, is a little cave (it’s the one featured in the intro, where Slade steals the two jewels). It’s on the bottom floor, you just have to search the sword (with ‘A’) to pick it up.
Where to find all of the 15 pieces of mithril, and what they're used for. Plus, a very plausible theory as to why there are 15 pieces of mithril in the game.