– adapted from Sega’s Shining Force 2 Manual
CONTENTS
1. THE SECRET OF GRANSEAL
The citizens of Granseal are hard at work. Inside the castle grounds, the centaurs concentrate on jousting and target practice while the spellcasters compare teleportation and healing spells. Granseal isn’t at war, but there has been trouble with monsters on the outskirts of the kingdom, and the king has ordered troops to sweep the area and drive the creatures away.
All notice the thunderclouds that gather above the castle. Not only is rain unusual for the season, but the storm does not look to be an ordinary one.
The storm is a harbinger of coming events – events which will change Granseal and its neighboring kingdoms forever. An ancient evil has broken free, and is spreading over the land of Rune, devastating all that it touches. Is there anyone, or anything, that can stop it? Start the adventure and find out!
2. TAKE CONTROL!
- i) Directional button (D-pad)
- Highlights options/items
- Moves characters
- Speeds through messages (press and hold)
- ii) Start Button (Start)
- Skips through opening scenes
- iii) Button A
- Opens Options windows and status windows
- Speeds through messages (Press and hold)
- Selects a character on Name Entry screen
- iv) Button B
- Cancels selections
- Speeds through messages (Press and hold)
- Brings up a character cursor during battle scenes
- Deletes a previously chosen character on Name Entry screen
- v) Button C
- Opens Options windows and status windows
- Speeds through messages (Press and hold)
- Initiates conversations when standing next to a non-Player Character (NPC)
- Selects a character on Name Entry screen
- Initiates search of a nearby object
Note:
Buttons X, Y and Z on the 6-button control pads have no functions in this game.
3. WHICH TO CHOOSE….
Following the SEGA logo, Shining Force 2 opens with the story that precedes your adventure. Press Start at any time to move to the Title screen, then press Start again to start your adventure.
You can place 2 games in the memory. If you already have one game saved, you have 4 choices available: START to begin a new game, CONT. to continue a previously saved game, DEL to delete a game, or COPY to duplicate the game.
If you’re playing for the first time, only the START option is available. Press button A or C, then press the D-pad left or right to select the space to store the game data in, then press button A or C again to proceed.
4. WHAT’S IN A NAME?
You name the leader of the Shining Force in the next screen. You can enter up to 7 characters in the Name Select screen, or leave it blank and use the default name, “Bowie”. Press the D-pad to highlight a character, and press A or C to select it. if you make a mistake, press B to delete the character. When you’ve finished, highlight ‘END’ and press A or C to start the game.
5. DELETING AND COPYING A GAME
The DEL function allows you to open a space for a new game by getting rid of an old one. Pick the game you wish to delete, and press A or C. You can copy a game to try a certain strategy while having the option of going back later and trying again if things don’t go well. Use the D-pad to pick the game you wish to copy, and press A or C.
Note: You can only copy a game if you have an empty game space available. If both spaces are filled, you have only 2 options: CONT. and DEL
6. YOUR ADVENTURE BEGINS
As a student of Astral the Wizard, you and your friends study all the usual subjects: reading, writing and swordfighting. Your adventure begins on what is to be your last day of school, not to mention the last time you’ll see your home, and even the land where you were born.
Dark events are taking place on the Island of Grans. The two jewels which seal the Door to Darkness have been stolen from the Ancient Tower. These jewels were the barrier that kept Zeon, a creature of awesome evil power, trapped inside the tower. Finding where the jewels have been taken, and why, is a task that only the bravest of adventurers would dare to
undertake.
7. MISSION COMMANDS
Various options are available in each situation you and your team find yourselves in. In non-battle situations, press A to see your Options and press B to close the Options window. In battles, press B, move the white highlight brackets to an unoccupied area on the map and press A to see your special game options (see later sections on Options)
8. WALKABOUT OPTIONS
 In non-battle situations, such as walking around a town, you can access your Walkabout options by pressing A or C. If your leader is standing next to someone, start o conversation by pressing C. Likewise, standing in front of an item and pressing C allows you to check the item out. You may find something useful!
![]()
![]() i) Member
i) Member
Select this option to see information about a character. Move the highlight box to the name of the character you wan to see. Press the D-pad left or right for points of information and press A or C to access his or her Statistics chart.
![]()
![]() ii) Item
ii) Item
If you want to use an item that one of your characters is carrying, select this and a second set of options appears on the screen (see later for items options)
![]()
![]() iii) Search
iii) Search
Use this to open treasure chests, take a look at objects and explore areas that look suspicious. You will be required to use this command in certain situations.
![]()
![]() iv) Magic
iv) Magic
This command allows you to use magic spells (see later section)
Note: With the exception of Detox and Egress spells, magic spells do not work in non-battle areas.
9. ITEM OPTIONS
 These options allow your characters to do various things with the items they’re carrying. First choose what you want to do with the item. Next highlight the character who is carrying the item. The items each character is carrying are displayed. Press the D-pad in the direction of the desired item to highlight it, and press A or C. To leave the window, press B.
![]()
![]() i) Use
i) Use
This command lets you use any item that any of your characters are carrying.
![]()
![]() ii) Equip
ii) Equip
Use this to equip a character with a weapon.
![]()
![]() iii) Drop
iii) Drop
Use this to discard an item that someone is carrying.
![]()
![]() iv) Give
iv) Give
Use this to transfer items between characters. Select the item as explained above and then the character you’ll give it to.
10. SHOP OPTIONS
There are usually two shops in every town – one selling weapons, the other selling special items and healing potions. They often have a sign outside with either a bottle or a sword on it. Step inside, walk up to the counter, press C and the shopkeeper will ask you what you want.
![]()
![]() i) Buy
i) Buy
When buying, use the D-pad to highlight your choice and press A or C to select it. The shopkeeper will give you the price. Press the D-pad to highlight YES, then select the character who will receive the item. You can refuse a purchase by either selecting NO and pressing button A or C or just by pressing B at any time.
Note: If a character can’t use a weapon, the shopkeeper will ask if you still want to buy it. Don’t buy an item you can’t use unless you’re going to transfer it to another character.
![]()
![]() ii) Sell
ii) Sell
When selling an item, highlight the character who has the item you want to sell and press A or C. Next highlight the item. The shopkeeper will give you a price: take it or leave it, as in buying.
![]()
![]() iii) Repair
iii) Repair
If you want an item repaired, highlight the character who has the damaged item and press A or C, then select the item.
![]()
![]() iv) Deals
iv) Deals
If you want to know what the special items on sale are, select this option. You can buy them as described in part (i).
11. CARAVAN OPTIONS
You will undoubtedly run across an odd fellow named Dr. Rohde in your travels. He has spent his life studying books that explain a special magic called ‘mechanics’. Eventually you’ll come across an ancient machine called a Caravan, and if anyone can get it working again, he’s your man. And what good is the caravan to you? Read on!
To use the Caravan, just move the Leader over it and press C. The following options appear:
![]()
![]() i) Join
i) Join
This command allows you to change members of the force when you have over 12 people. Just select who you want from the ‘spares’ and then choose who will leave the team in their place.
![]()
![]() ii) Item
ii) Item
Same as in section 9.
![]()
![]() iii) Purge
iii) Purge
Use this to place members of the party in the Caravan when they’re not needed.
Note: You can place as many characters in the Caravan as you want (except the leader), but it may be safer in battles to have too many as opposed to having too few.
![]()
![]() iv) Depot
iv) Depot
Store excess items in the Depot for later use.
12. DEPOT OPTIONS
The Caravan has a large cargo area which you can store items in. The following options are available when you choose “Depot” from the Caravan Options.
![]()
![]() i) Look
i) Look
Use this to see what is in the caravan, what it does in battle and what it’s worth.
![]()
![]() ii) Derive
ii) Derive
Take an item from the caravan and give it to a character.
![]()
![]() iii) Drop
iii) Drop
Same as the Drop command in section 9.
![]()
![]() iv) Deposit
iv) Deposit
Highlight the item you want to put in the caravan and press A or C.
13. ABBEY OPTIONS
 In every town you will find an Abbey, inside of which is a priest, ready to help you and the Force. Answer YES or NO to his questions and select characters in the way described before.
![]()
![]() i) Save
i) Save
Use this to save you current game at the present location.
![]()
![]() ii) Raise
ii) Raise
Revive a member of the Force who was defeated in battle. (you have to pay for this!)
![]()
![]() iii) Promote
iii) Promote
When a character reaches LV20, he can be promoted to a higher class.
![]()
![]() iv) Cure
iv) Cure
Has the same effect as a DETOX spell. It removes a curse or poison from a person.
14. COMBAT OPTIONS
 I’m not gonna bother with all the heroic talk before this section, because it’s of very little use 🙂 The area your player can move in will flash. Move him with the D-pad, then press A or C to get these options:
![]()
![]() i) Attack
i) Attack
Obvious really! A flashing area will appear where you can attack. If there is more than one monster, you have to choose which one to go for.
![]()
![]() ii) Item
ii) Item
Select the item you want to use and whom you will use it on (within the allowed area)
![]()
![]() iii) Stay
iii) Stay
Leave your character on that spot until his next turn.
![]()
![]() iv) Magic
iv) Magic
Use a magic spell. Rather like using an item. I’ll explain the spells later on.
15. SPECIAL COMBAT OPTIONS
 Before your character moves, press B and either select (with A) an enemy, one of your team-mates or a piece of land, with the white brackets. You’ll gate these options if you select the land, if not you’ll get the stats of the person you selected.
![]()
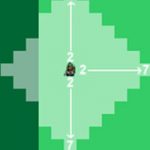
![]() i) Map
i) Map
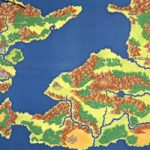
Will bring up a map of the battle ground. Green dots represent your team, red ones are the monsters.
![]()
![]() ii) Member
ii) Member
Check the stats of a member.
![]()
![]() iii) Quit
iii) Quit
Exit the game. It’ll save your current position in the battle.
![]()
![]() iv) Speed
iv) Speed
Choose the speed you want messages displayed at, or switch them off altogether.
Note: Use the Egress spell to retreat from the battle if it gets too much! Your HP will be restored but curses or poisons will remain and must be cured.
16. CLASSES, WEAPONS, ITEMS & SPELLS
CLASSES:
ACHR – Archer
BDBT – Bird Battler
BDMN – Birdman
BWNT – Bow Knight
BRGN – Brass Gunner
GLDT – Gladiator
GLM – Golem
HERO – Hero
KNTE – Knight
MAGE – Mage
MNMK – Master Monk
NINJ – Ninja
PLDN – Paladin
PGNT – Pegasus Knight
PHNK – Phoenik
PNNX – Phoenix
PRST – Priest
RNGR – Ranger
RDBN – Red Baron
RBT – Robot
SNIP – Sniper
SORC – Sorcerer
SDMN – Swordsman
THIF – Thief
VICR – Vicar
WARR – Warrior
WFBR – Wolf Baron
WFMN – Wolfman
WIZ – Wizard
WEAPONS:
![]()
![]() *Arrows:
*Arrows:
Wooden, Iron, Steel, Robin: ACHR, RNGR, BWNT, BRGN, SNIP
![]()
![]() * Spears & Lances:
* Spears & Lances:
(S) Wooden, Short, Spear, Power, (L) Bronze, Steel: KNTE, PLDN, PGNT
![]()
![]() * Axes:
* Axes:
Short, Hand, Middle, Power, Battle: WARR, RDBN
![]()
![]() * Rods:
* Rods:
Wooden, Short, Bronze, Iron, Power Stick: PRST, MAGE, SORC, WIZ
![]()
![]() * Knives:
* Knives:
Short, Dagger, Knife, Thieve’s Dagger: THIF
![]()
![]() * Swords:
* Swords:
Wooden, Short, Middle, Long, Steel: SDMN, HERO, BDBT, BDMN, RDBN, NINJ
Achilles: HERO only
![]()
![]() * Hand to Hand:
* Hand to Hand:
Leather Glove, Power Glove, Brass Knuckles, Iron Knuckles: MNMK
ITEMS:
There are a lot of different items to be found in the game, some are more common than others. Here are some of the ones you are most likely to find, but >there are quite a few more.
![]()
![]() * Medical Herb, Healing Seed/Drop:
* Medical Herb, Healing Seed/Drop:
Restore HP
![]()
![]() * Rings:
* Rings:
Effects vary
![]()
![]() * Edible Items:
* Edible Items:
Increase stats
![]()
![]() * Antidote:
* Antidote:
Cures poisons
![]()
![]() * Angel Wing:
* Angel Wing:
Same as Egress spell
SPELLS:
![]()
![]() BLAZE: Fire
BLAZE: Fire
![]()
![]() FREEZE: Ice
FREEZE: Ice
![]()
![]() BLAST: Whirlwind
BLAST: Whirlwind
![]()
![]() BOLT: Lightning
BOLT: Lightning
![]()
![]() MUDDLE: Muddles monsters & sometimes stops them attacking
MUDDLE: Muddles monsters & sometimes stops them attacking
![]()
![]() DESOUL: Instant death, but doesn’t always work
DESOUL: Instant death, but doesn’t always work
![]()
![]() SLEEP: Puts enemy to sleep
SLEEP: Puts enemy to sleep
![]()
![]() SLOW: Reduce enemy’s stats for a while
SLOW: Reduce enemy’s stats for a while
![]()
![]() BOOST: Boost your stats
BOOST: Boost your stats
![]()
![]() EGRESS: Retreat to re-group
EGRESS: Retreat to re-group
![]()
![]() HEAL: Heals!
HEAL: Heals!
![]()
![]() DETOX: Cures poison
DETOX: Cures poison
![]()
![]() AURA: Heals a group
AURA: Heals a group
![]()
![]() DISPEL: Block enemy’s magic
DISPEL: Block enemy’s magic
![]()
![]() QUICK: Increase your attack
QUICK: Increase your attack