A full player guide to part one of Shining Force 2, covering North Parmecia.
Easy ‘at-a-glance’ reference Simply look down the side of the page to find the place name you’re looking for.
Spoiler-proofing If you don’t want to spoil the whole game, press the button below. The walkthrough background will turn black, hiding all but the colour-coded words and enemy icons. You can highlight text with your mouse (or finger, on a touch screen) to view it.
Colour code: If you’re looking something in particular, then the code will make it easier to spot! locationcharacteritem
Icon key: Bosses marked with this symbol destroy all other monsters when killed, the battle ends when they die. Click to download some GeneCyst save games (see “How to use Save Games” on the FAQ Page) Click for more information about that location, including maps, items, book names etc.
Ketto
On your arrival in North Parmecia, you’ll go to the town of Ketto, which has been taken over by the Devils. The Weapons Seller and the Priest are not in their buildings, but around the town. The Priest is actually next to the church but the Weapons Seller is a little more difficult to locate. You need to go behind the far-right house and work your way through the bushes. you’ll find him on a little piece of land that juts into the water. He’ll then take you to his shop. There are Healing Water and Bright Honey in Ketto. After the battle to Pacalon, Higins will join (during the battle you can win the Black Ring).
Battle 26
To Pacalon
Boss: Lizardman
Monster
#
HP
MP
AT
DF
AG
MV
Dark Sniper
3
38
0
53
37
35
5
Lesser Demon
4
40
21
61
37
32
6
Dark Bishop
2
39
38
54
38
27
5
Dark Soldier
4
35
17
63
46
34
4
Wizard
1
37
37
59
40
44
5
Lizardman
1
40
0
67
45
38
6
Pacalon
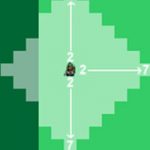
There is a lot to be found in Pacalon, including the Pegasus Wing, Medical Herb, Fairy Powder and some Mithril. The Mithril is in the treasury, which can be reached with a bit of work: when you go in the top-left room of the castle, next to the wall you’ll be able to see some stairs and a group of 3 stones. To get to the stairs, just walk through the wall opposite the stones (they are a marker) and you can then use them to reach the treasury. The Pegasus Wing is at the bottom of the blue carpet from the throne room. Walk down it, on the right and search the wall, using A. A lot of people seem to have problems finding it, but I promise you it’s there! There is also a Cheerful Bread in a vase in the house next to the church. A girl in Pacalon will tell you to find a route through the mountains to the North to reach Mitula in Tristan, on your way, you’ll go past a part of the mountains that points up, search the peak of this to find a piece of Mithril
Battle 27
To Tristan
Boss: Northernmost Lizardman
Monster
#
HP
MP
AT
DF
AG
MV
Dark Sniper
4
38
0
53
37
35
5
Dark Bishop
3
39
38
54
38
27
5
Dark Soldier
3
35
17
63
46
34
4
Wizard
1
37
37
59
40
44
5
Lizardman
3
40
0
67
45
38
6
Wyvern
2
46
0
72
39
27
5
Pangoat Valley
There will be a battle on the bridge, in which you fight to rescue a girl who is trapped…
Battle 28
Pangoat Bridge
Boss: Wizard
Monster
#
HP
MP
AT
DF
AG
MV
Dark Sniper
1
38
0
53
37
35
5
Lesser Demon
4
40
21
61
37
32
6
Dark Soldier
1
35
17
63
46
34
4
Wizard
1
37
37
59
40
44
5
Lizardman
1
40
0
67
45
38
6
Wyvern
3
46
0
72
39
27
5
Master Monk
1
47
39
66
45
31
6
Worm
4
45
0
75
40
34
5
Pangoat Valley
…only to discover at the end that she is the Greater Devil, Cameela! You don’t fight her yet though… from here continue to Tristan.
Tristan
Search the many passageways in the mountainside to find two Healing Seeds and a Protect Milk. Once you have finished in the town, go into the Shrine.
Mitula’s Sanctuary
Here you’ll have a battle to reach the Shrine’s Entrance. During the battle, you may notice a chest floating on an Island in the water, unfortunately, this can only be opened in the Japanese version of the game. It only contains a Shining Ball anyway.
Battle 29
Outside Mitula’s
Boss: Dark Knight
Monster
#
HP
MP
AT
DF
AG
MV
Wizard
2
37
37
59
40
44
5
Wyvern
3
46
0
72
39
27
5
Master Monk
3
47
39
66
45
31
6
Worm
4
45
0
75
40
34
5
Orc Lord
2
46
13
73
44
37
5
Dark Knight
1
50
0
76
48
40
7
Mitula’s Sanctuary
Inside the Shrine you’ll fight the easiest of the Greater Devils, Zalbard. His bolt is quite tough, but just make sure he’s surrounded and you’ll be fine.
Battle 30
Zalbard
Boss: Zalbard
Monster
#
HP
MP
AT
DF
AG
MV
Wizard
2
37
37
59
40
44
5
Wyvern
1
46
0
72
39
27
5
Master Monk
1
47
39
66
45
31
6
Gargoyle
1
29
0
38
23
21
6
Orc Lord
2
46
13
73
44
37
5
Dark Knight
5
50
0
76
48
40
7
Harpy Queen
2
53
20
81
39
43
7
Zalbard
1
80
65
91
50
52
5
Mitula’s Sanctuary
Talk to Mitula when the battle is over and she’ll fill you in on some more details. Go to the left and you’ll find a chest (containing a Critical Sword) and a doorway. Through the doorway there is a statue, search it and Taya will join you. In the rest of that passage are another 2 chests, containing Power Water and Healing Seed. Then go to the door on the right side of the shrine and you’ll find another chest (containing a piece of Mithril) and through the door, a lot of statues: these are the Story Tellers of Tristan. Search them in order and they’ll explain some more. on your way out of Tristan, Skreech will join (if he fell on you at Bedoe). Now return to Pacalon.
Pacalon
Talk to Vicar Frayja in the throne room, and he’ll go with you to Moun. As you leave the castle and enter the town, you’ll be confronted with a battle.
Battle 31
Inside Pacalon
Boss: Devil Soldier
Monster
#
HP
MP
AT
DF
AG
MV
Necromancer
1
47
42
75
44
51
6
Master Monk
2
47
39
66
45
31
6
Orc Lord
3
46
13
73
44
37
5
Dark Knight
3
50
0
76
48
40
7
Harpy Queen
4
53
20
81
39
43
7
Devil Soldier
1
60
16
84
48
43
6
Dark Bishop
1
39
38
54
38
27
5
Pacalon
After the battle, head out towards Moun, and you’ll find yourself in another battle. Jaro will join part way through, after deciding that he doesn’t want to fight with the devil army anymore.
Battle 32
To Moun
Boss: Bow Master
Monster
#
HP
MP
AT
DF
AG
MV
Necromancer
2
47
42
75
44
51
6
Master Monk
2
47
39
66
45
31
6
Cerberus
3
51
0
87
44
45
6
Pegasus Knight
4
65
0
81
37
47
7
Bow Master
1
46
0
87
53
40
5
Devil Soldier
3
60
16
84
48
43
6
Jar
1
59
0
74
44
46
7
Moun
You may have found Moun earlier, only to discover that the gate was locked: only Frayja has the keys to open it, which he does when you arrive. Inside there’ll be a battle, in which Frayja will join and fight with you. Before you do this return to the South, to Creed’s Mansion.
Creed’s Mansion
When you return, you’ll find the place has been damaged pretty bad. Goliath, Creed’s Servant, will inform you that Oddler remembered something and went psycho. He thinks that Creed fell into the sea and died. If you speak with the three characters you rejected earlier in the game, they’ll all be willing to join you now. Once they’ve joined, head back to the North to fight the battle at Moun.
Battle 33
Inside Moun
Boss: Shaman
Monster
#
HP
MP
AT
DF
AG
MV
Necromancer
2
47
42
75
44
51
6
Cerberus
3
51
0
87
44
45
6
Pegasus Knight
2
65
0
81
37
47
7
Bow Master
3
46
0
87
53
40
5
Devil Soldier
3
60
16
84
48
43
6
Mud Man
2
55
0
95
51
41
4
Shaman
1
56
46
82
42
40
5
Moun
After this, you’ll meet Zynk, who’ll take you to their underground hideout. Search the barrels and vases to find Running Pimento and Angel Wing. Talk to the people here and Gyan will join the force. When you go out of the passages, the people have re-inhabited their homes and will ask you to take away the Arm of Golem. To get it, you need to walk on/search the top left square, then the arm will appear. Search it to pick it up. You need it to get Claude to join later in the game. From here, go through the West Gate to Nazca.
Nazca
You’ll fight Cameela here, but make sure that whoever kills her has an empty item slot, since she’ll drop the Sky Orb when she dies (she’ll also warn you that Geshp has ‘Prism Flowers’ & during the battle you can win a Wish Staff).
Battle 34
Cameela (Nazca Ship)
Boss: Cameela
Monster
#
HP
MP
AT
DF
AG
MV
Necromancer
1
47
42
75
44
51
6
Cerberus
2
51
0
87
44
45
6
Pegasus Knight
3
65
0
81
37
47
7
Bow Master
2
46
0
87
53
40
5
Dragonewt
4
60
0
87
42
46
6
Mud Man
3
55
0
95
51
41
4
Shaman
1
56
46
82
42
40
5
Cameela
1
99
0
96
52
58
6
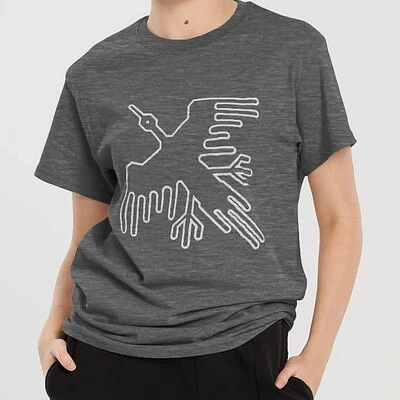
Nazca
You’ll find that the battle ground is in the shape of a huge bird: this is the Nazca Ship, in which you’ll travel back to Grans Island. Walk into the ‘eye’ of the Nazca Ship to enter it. Inside you’ll find the Nazca Cannon, a weapon. Say when you’re ready to go, and then you’re on your way back to your homeland and to the dark realm of Arc Valley…
Experience is based on your strength relative to the monster you are fighting. These are the levels at which you will gain only 1 EXP for defeating each monster.
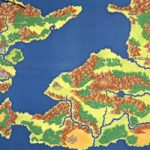
A map of the Shining Force 2 world (Grans Island and Parmecia) with pages about each town, including buildings, town maps, characters, items, key events and even the books and signs you'll find there!